How to Smoke Meat in the Wild: DIY Tips and Techniques
Welcome to the wild! Are you looking for ways to cook and preserve meat without modern equipment? Smoking is a popular technique used by wilderness enthusiasts because it adds flavor and extends the shelf life of meat. In this article, we will guide you through smoking meat in the wild using DIY tips and techniques. We will cover hot smoking vs cold smoking methods, various preservation techniques like curing, pickling, burial, confit, rendering fat etc., preparing a DIY smoker with natural materials from your surroundings and gathering/preserving food when on an extended outdoor stay - all while enjoying nature’s freshness. Get ready to discover how easy it is to smoke meat in the wild while maintaining that rustic campfire flavor even far away from civilization!
What Is Smoking Meat in the Wild?
Smoking meat in the wild is a technique used to preserve food for extended periods while adding flavor. Simply put, it involves cooking meat by exposing it to smoke from burning wood or other materials. This process not only preserves and flavors the meat but also adds a layer of protection against bacteria and insects. Smoking meats may have originally begun as a preservation technique, but it has evolved into a culinary art form that enhances flavors in unique ways.
To smoke meat successfully, you will need to prepare your cooking area properly, source or build an outdoor smoker unit appropriately, choose the right kind of wood for smoking your particular type of meat, and carefully monitor factors like time and temperature throughout the cooking process. There are different methods for smoking meats such as hot smoking or cold smoking which cater depending on what you’re looking for in preserving your meats.
Whether you are thinking about embarking on a wilderness adventure or homesteading off-grid lifestyle long-term, incorporating survival-cooking techniques like smoked meats can offer more self-sufficiency options and new flavorful dishes.
Methods for Smoking Meat in the Wild
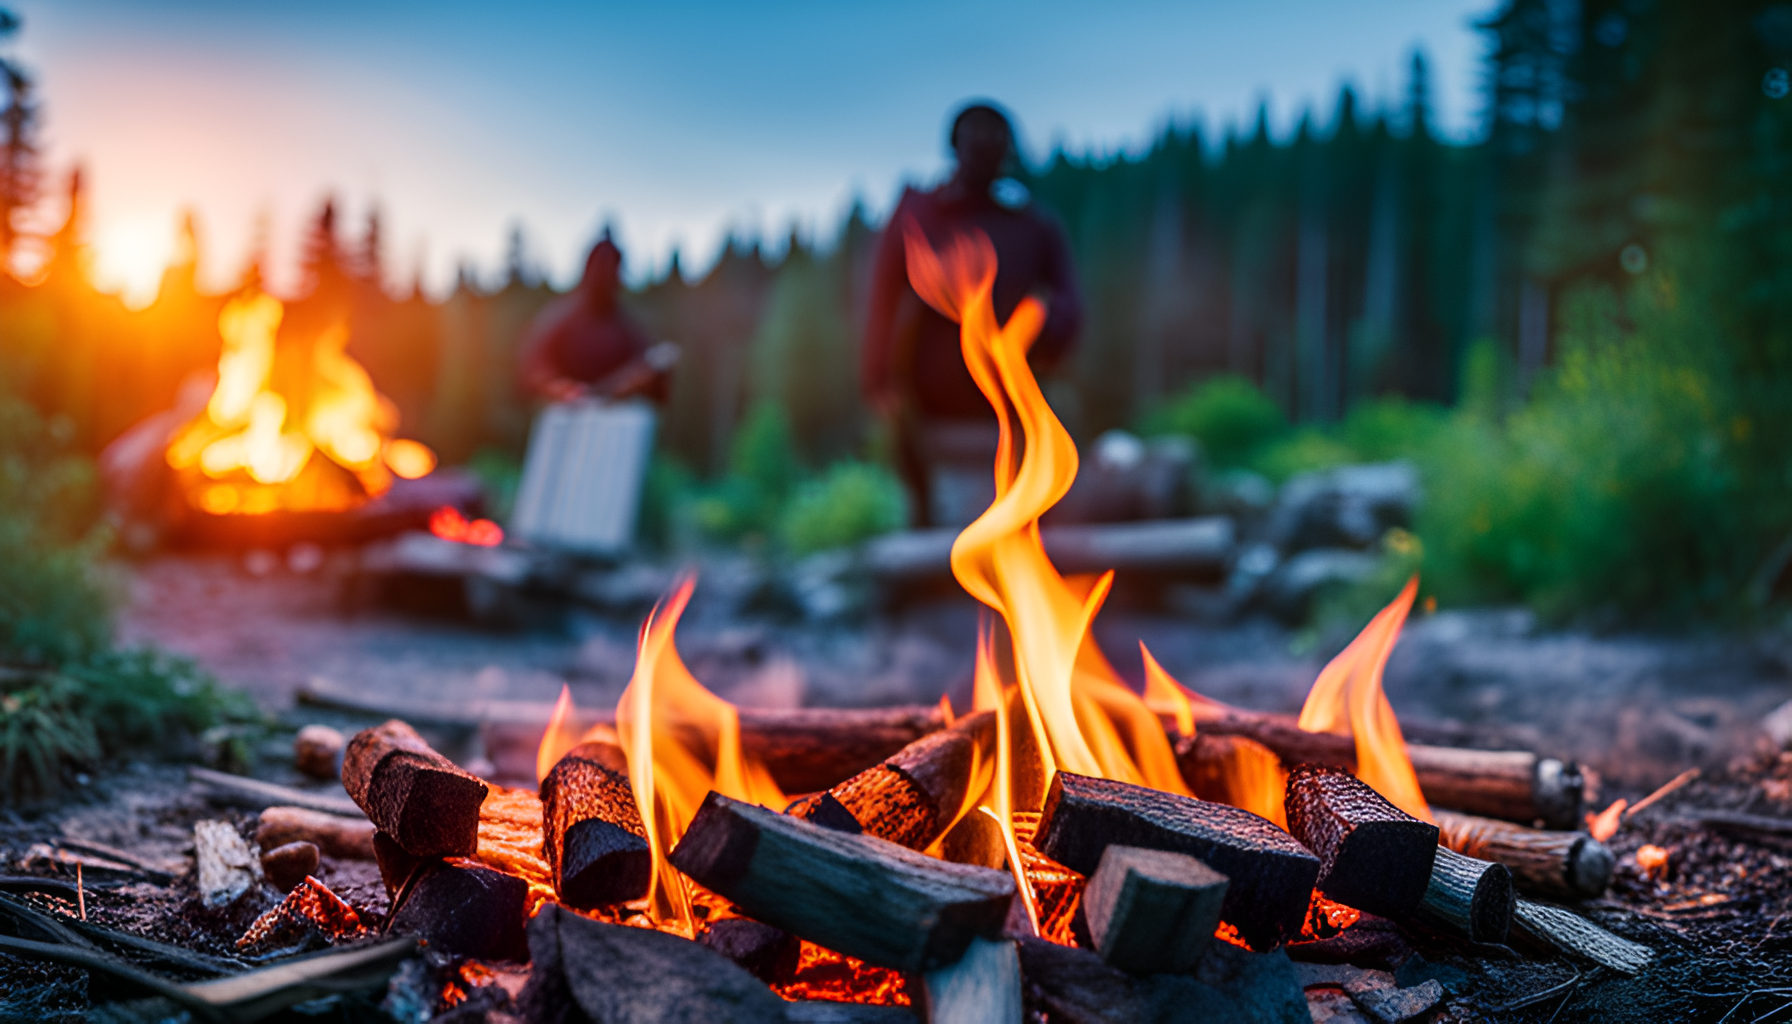
When I’m out in the wilderness looking to prepare some savory meat, there are two primary methods that I tend to use: hot smoking and cold smoking. You see, hot smoking is a bit of a twofer in that it cooks AND flavors the meat all at once. The heat from the fire or smoker brings the internal temperature of the food up which causes it to cook while smoke seeps into each nook and cranny enhancing its overall taste. Cold smoking though, well… that’s another story entirely! This method is all about adding flavors without busting up your thermometer as there isn’t much heat involved. Typically temperatures ranging between 68°F - 86°F (20°C-30°C) for longer periods, even several days! So naturally when considering what kind of animal protein will work best with this briny preparation style we go right to fish or pork belly.
As with any approach and technique especially preservation related “you pays your money and you takes your chance” - referencing personal preferences regarding taste as well as what implements are available can be helpful in deciding which avenue suits best. If you have plenty of time to spare PLUS materials at hand then setting up an outdoor smoker might be just what you need!
Hot Smoking
When smoking meat in the wild, hot smoking is a popular method that gets the job done well. You’ll need to cook your cuts at temperatures ranging from 165°F to 185°F while they’re being smoked. This ensures that your meat is not only safe to eat but also cooked through.
To make this happen, you’ll require a heat source like a campfire or portable stove. Bear in mind that using hardwoods such as oak, hickory or applewood is key when it comes to hot smoking. Softwoods can leave your cuts with a bitter taste you don’t want! To add some extra flavor and texture, try brining meats before cooking - it helps with moisture retention too.
Throughout the cooking process, keep an eye on your fire and maintain consistent temperature levels by adding more wood if required. The time it takes for your meat to smoke will depend on how thick and dense it is - typically two to six hours does the trick though.
Once done and dusted (or should we say smoked?), give your meat some chill time before serving or preserving it via techniques we mentioned earlier such as freezing or dry curing. Smoking food outdoors takes practice but nothing beats the intensely delicious natural smoky essences that infuse into game meats once you get the hang of things - give it a go on your next camping trip!
Cold Smoking
While hot smoking refers to cooking meat using direct heat from a fire or other heat source, cold smoking is a preservation technique that imparts flavor while keeping the meat raw. Cold-smoking temperatures typically range between 68-86°F (20-30°C) and can last for several days.
Some popular outdoor cold-smoked meats include salmon, bacon, and cheese. To attempt cold smoking in the wild, you’ll need to build your own DIY smoker using materials found on site such as rocks, branches or even sticks. Once built, choose the right type of wood chips to achieve the desired smoke flavor.
Ventilation is critical when it comes to cold smoking; proper ventilation will allow fresh air to circulate into your smoker while also expelling smoke out. You can experiment with different natural techniques for ventilation by choosing various sized vents on your homemade smoker.
It’s important also to note that before consuming any food prepared through home preservation methods you must ensure its safety and quality by closely following information from reliable sources regarding preserving processes and storage techniques conducive of ensuring their healthfulness - particularly if you plan on survival cooking in an extended emergency situation.
Hot Smoking vs Cold Smoking
https://www.youtube.com/watch?v=YRg7V0D6fQs
When it comes to smoking meat in the great outdoors, there are two primary approaches: hot smoking and cold smoking. Although both methods can add tasty flavor and help preserve your meat, they have some distinct differences.
Hot Smoking. When you hot smoke meat, you expose it to both heat and smoke simultaneously, which cooks the flesh while also infusing it with a smoky aroma. This requires temperatures around 165°F (74°C) or higher and may take several hours for completion. Hot smoking is particularly effective for thicker cuts of meat such as pork shoulder or brisket.
Cold Smoking. Conversely, cold smoking involves treating your meat with smoke only without cooking it at all. The temperature shouldn’t go beyond 85°F (29°C). Cold smoking may last several days if you desire a strong flavor infusion into your meats. This method preserves the texture of the fish/game while imparting an intense smoky aroma that enhances its distinctive taste.
So which approach is better—hot or cold? It depends on what you want! If you crave fully cooked but still flavorful hard-to-spoil meat then pick “hot”, but if your goal is to enhance gamey taste with bold flavor without significantly altering its composition then “cold” style will be more appropriate.
Preserving Meat in the Wild
As a survival technique, it’s important to know how to preserve meat while living off the grid, and there are several ways to keep your meat edible and nutritious. Here are some of the most effective methods I’ve tried:
- Sunlight Preservation: Drying meat in direct sunlight removes moisture and hinders spoiling.
- Curing and Corning: Rubbing salt on the surface prevents bacterial growth. Corned beef uses additional spices for flavor.
- Pickling: Soaking the meat in vinegar or brine lowers its pH level, making it more acidic and less susceptible to bacterial growth.
- Smoking: When done right using natural woods like hickory or mesquite chips, smoking helps preserve meat through dehydration. It also adds unique flavor while imparting antimicrobial properties that can be stored without refrigeration - pork belly bacon is an excellent smoked rendition!
- Freezing: An efficient method as frozen food stays fresh up to six months or more depending on packaging used.
- Burial/Pits: Digging pits into soft ground utilizes cool underground temperatures as a natural refrigerator because they stay between 4–8 °C (39–46 °F), even during extreme heatwaves.
- Confit - Cooking game-fat like duck until tender at low temperature usually below 100ºC either submerged completely (immersed) or semi-immersed (covered halfway).
- Rendering Fat - Heating animal fats rendering all solid elements increasingly separates fatty tissue from any proteins suspending inside oil releasing them to the solid element. The rendered fat functions as a preservative extending shelf life.
While each method has advantages and disadvantages, it’s essential to choose one or combine methods based on your situation. It’s crucial also to follow correct procedures for food safety first when preserving meat in the wild.
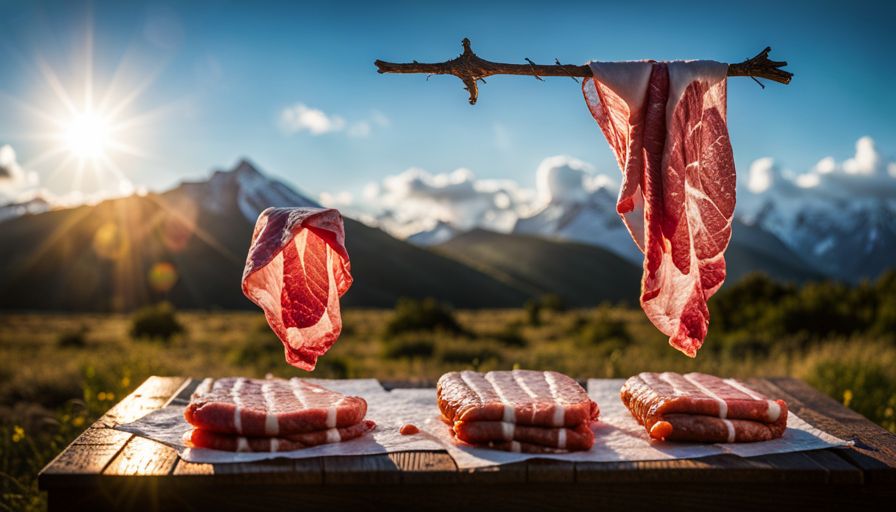
Sunlight Preservation
When it comes to preserving meat in the wild, you might wonder whether using sunlight preservation is a viable option. Surprisingly enough, this “out-of-the-box” technique can be quite effective without requiring any equipment or supplies.
Here’s what you need to do: start by selecting lean cuts of meat only. Fat tends to spoil quickly when exposed to light, which makes fatty meats less suitable for this method.
Next, slice the meat thinly and let it hang directly under the sun. UV rays from sunlight help kill bacteria and pathogens responsible for meat spoilage. But beware! Ensure that your hanging jerky is inaccessible to flies and other pests by covering it with cheesecloth or muslin while it dries.
While there are some minor risks that come with using sunlight preservation (think weather conditions and potential contamination), many people have used this victual-preservation approach successfully throughout centuries of outdoor living.
However, note that your preserved jerky will last only a few days before succumbing to bacterial growth. So use this method as a stop-gap solution until you find an alternative means of food preservation.
Curing and Corning
Preserving meat in the wild can be a challenge. Luckily, two methods have become popular for their ease and effectiveness: curing and corning.
Curing involves applying salt, sugar, herbs, and spices to meat. The result is a flavorful and tender protein that lasts for weeks without refrigeration. This technique draws out moisture from the meat and prevents bacterial growth—perfect for wilderness living.
Corning uses a brine solution to soak the meat before drying it, extending its shelf-life up to three months without refrigeration. It’s similar to curing but adds an extra layer of preservation.
To ensure food safety when using these methods, it’s crucial to fully submerge all surfaces of the meat in the cure mixture or brine solution. Consistent kitchen temperatures during curing/corning are necessary as well—no fluctuation allowed!
Although preparing your cured or corned meats takes time, they offer a great option for long-term storage while camping or surviving in the wilderness—all while tasting delicious!
Pickling
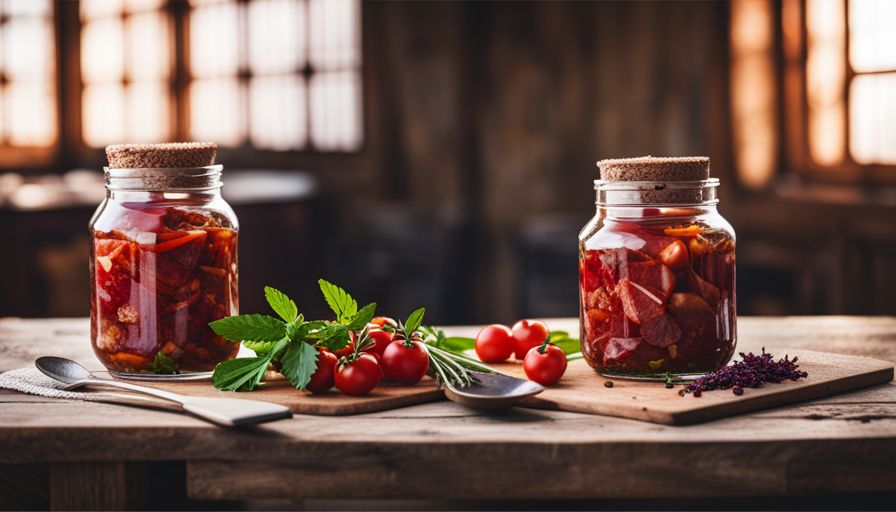
I absolutely love pickling meat when I’m out in the wild. It’s pretty simple too - just immerse your slices of meat in a mixture of vinegar or acidic brine and let it do its magic for between 24 hours and several weeks! The goal is to create a bacteria-free environment for preservation, which ensures that the meat stays fresh long after your hike has ended.
There are so many advantages to pickling your meat while camping. First off, it gives your food a tangy flavor that tickles the taste buds. Secondly, you get some added nutritional value, all while avoiding harmful bacteria!
To make sure you pickle effectively, start by choosing high-quality cuts of fresh meat. Next up: mix up that vinegar or brine solution with salt, sugar, spices or any other favorite ingredients and pour it over the slices. Let those flavors sink in for at least 24 hours - trust me; it’s worth the wait!
Once you’re happy with the level of sourness (I like mine pretty sour), remove your cured slice(s) from the mixture and wipe them dry using a damp cloth before storing them away in an air-tight container until mealtime rolls around.
Overall, pickled meats help tremendously with traveling light as they don’t require refrigeration. This means you can bring more meals without worry about spoilage due to high temperatures common in wilderness atmospheres!
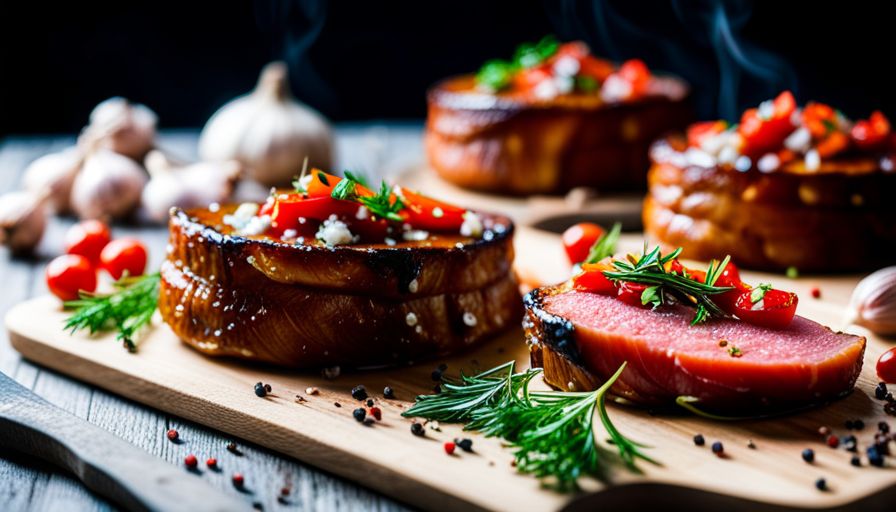
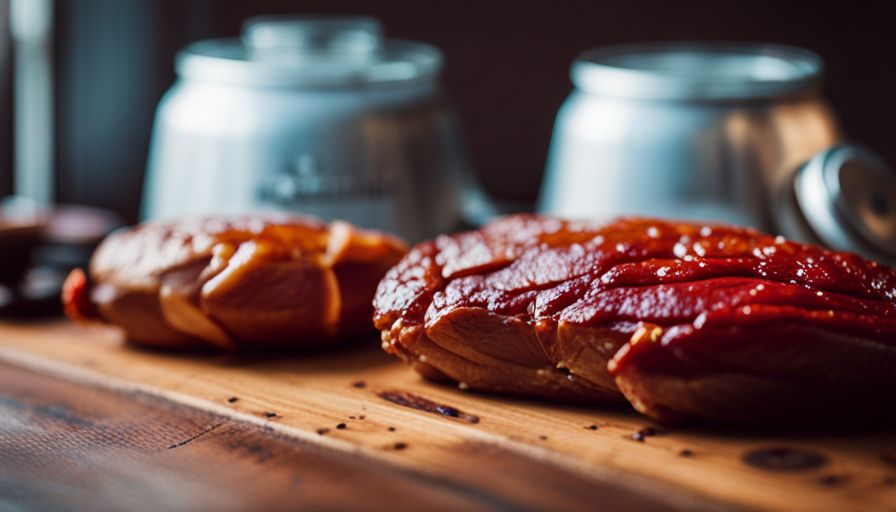
Smoking
Outdoor smoking is an excellent way to preserve meats while enhancing their flavor. Smoking meat in the wild is a skill that every survivalist or outdoor enthusiast should have. In this section, we’ll explore essential techniques and tips to help you smoke meat successfully during your next camping adventure.
When it comes to smoking meat, you can use various techniques such as hot smoking, cold smoking, natural smoke flavor using wood, and much more. Each of these techniques produces different flavors and requires unique setups.
Before embarking on this endeavor, gather relevant wilderness cooking equipment such as a smoker box or build an outdoor smoker if necessary. Choose the right materials for gathering fuel for your fire and select the right type of wood species according to what would best complement the protein you plan to smoke.
Once all elements are neatly gathered and placed comfortably around your campfire pit, prepare the meat accordingly. Properly removing excess moisture from your cut piece beforehand will allow maximum smoke penetration into each pore that is guaranteed with smooth consistency throughout all parts cooked evenly at once. Now it’s time to get started with our guide filled with DIY outdoor smoker recipes so you can better start enjoying delicious smoked meats anywhere!
Freezing
When I’m out in the wilderness and need to preserve meat, I often default to freezing it. While some might see this as a modern solution that goes against primitive ways, I’ve found that when paired with smoking or used as a last resort, freezing can be incredibly effective at stopping spoilage and preventing bacteria growth.
Before tossing your meat into the freezer, there are some steps you’ll need to take first. Proper preparation is key, so make sure your meat has been smoked if possible. Additionally, taking care to wrap it tightly can prevent pesky freezer burn from creeping in. Don’t forget to label your packages with the date you froze them too – keeping an eye on freshness is crucial.
Now, while freezing may work well for some folks – depending on their access to resources like ice or electricity for long-term storage – there are other tactics worth considering too. Smoking or even digging underground to bury the meat until needed could be viable alternatives in a pinch!
Burial

If you’re ever stuck in the wild, preserving your food can be a matter of life and death. Believe it or not, one method for preserving meat is to bury it underground! Of course, this sounds counterintuitive, but try to bear with me. When done properly, burying meat can help keep insects and animals from getting to it so that you have an edible source of sustenance.
What you’ll need to do first is dig a deep enough hole where it won’t be unearthed by pesky critters. Ensure that your meat is small enough to fit entirely into the hole - think fish or squirrel-sized. Once the meat’s safely stowed away, layer leaves, dirt, or sand over it until there’s no space left uncovered. This covering will act as insulation against the elements and other creatures.
It might rain when you least expect it while in survival mode; prior weather conditions will affect whether using this method makes sense for your situation or not since too much rain could flood your pit and waterlog your food.
Even though burying your meats can help extend their shelf-life without refrigeration or electricity, be warned that maintaining flavor integrity past a few days isn’t guaranteed. For survival situations (or just because), smoked meats are preferred if taste bud appeal isn’t something you’re ready to compromise on - we discussed more flavorful options earlier in this post!
Confit
I can’t resist sharing with you why confit is a genius method for storing meat, it’s truly a game-changer! Back in the day before refrigerators existed, our ancestors had to come up with creative methods like confit to preserve food.
To create this delicious French delicacy, start by seasoning your selected meat with a mix of salt, pepper, herbs, and spices. Let it marinate for 24 hours minimum before commencing cooking. Once ready to start cooking, heat some tasty duck or goose fat until it’s liquid enough to immerse the meat entirely in a Dutch oven or pot.
Then comes the fun part: simmering on low heat for many hours until the meat becomes utterly tender from perfectly melted fat absorption. Once happy with how juicy everything looks and smells (yum!), remove your delightful creation from the cooking oil. Next up is letting them cool down first before removing any remaining fat which has contributed extra flavour throughout cooking.
Last but not least – sterilised jars covered with their own strained cooking water are key to preserving this dish without refrigeration; keeping your preserves pristine for six whole months in cool dark places best suited for prolonged wilderness survival situations where fridges might be tricky to come across.
Savour each scrumptious bite as the cooked-in flavours give way - they’re sure to mesmerize anyone willing enough to try out an exquisite culinary masterpiece that is confit.
Rendering Fat

Rendering fat is a crucial step when smoking meat in the wild. In fact, rendering animal fat is an ancient method of food preservation that has been used for centuries. Plus, it adds flavor and moisture to your smoked meat.
To render the fat, cut it into small chunks or grind it down before heating over low heat until melted. You can use any part of the animal with enough fatty tissue such as pork bellies or beef briskets. Be sure to remove excess skin and cartilage beforehand.
Rendering generates a lot of smoke which can enhance the overall smoky taste while preserving your meat at the same time.
Once you have rendered your fat, you can mix it into ground meats such as sausage or burger patties before smoking them for added flavor. Additionally, you can coat vegetables with rendered fat before dehydrating them on a smoker to make a tasty trail mix snack on-the-go.
Remember to save any leftover rendered fats for future outdoor cooking adventures. Just be sure to store them properly in sealed, air-tight containers away from direct sunlight and heat sources so they won’t go rancid quickly.
DIY Meat Smoker in the Wild
When it comes to smoking meat in the great outdoors, you don’t necessarily need fancy equipment. With some creativity and resourcefulness, you can make your own smoker with materials found in nature. In this post, I’ll share tips and techniques for building a makeshift smoker.
First things first: before constructing your smoker, it’s important to understand the principles of meat smoking. Generally speaking, meat is smoked over low heat for several hours until it reaches a safe temperature and develops that beloved smoky flavor.
Now let’s gather materials! The key components you’ll need include stones or bricks for insulation, metal grates or wire racks to hold the meat and sticks or logs to generate smoke.
The type of wood used in smoking will also impact the taste of your final product. Opt for hardwoods like oak or hickory when smoking red meats; alternatively, fruitwoods such as apple or cherry pair well with poultry and fish.
To build your smoker from scratch, first create two stacked layers of stones; then place a grate on top for holding the meat. Before lighting any fires inside this construction make sure you have plenty water nearby so things do not get out-of-hand!
Before lighting up your firewood beneath everything else (indirectly), consider removing bones if necessary - more surface area = more flavorful smoked meat here folks! Although marinating prior to smoking is recommended but not essential –
Removing moisture from meat plays a crucial role in preservation processes occurring after successful efforts have been made towards making properly smoked meats: start by wrapping your food tightly in wax paper then letting it dehydrate at 140 degrees Fahrenheit overnight; mimicking our sun-drying technique mentioned above except indoors!
As we move onto actually smoking our meats there are a few tips n’ tricks that come handy: begin by lighting an indirect flame near those stone layers then add moistened wood chips onto that flame slowly managing both temperature distribution along with hydration levels throughout the cooking duration.
Once your meat is fully smoked, it’s essential to store it properly so that its flavor and texture don’t get compromised. For best results, tightly wrap your smoked meats in wax paper and keep them in a cool, dry place out of direct sunlight.
Give this DIY smoker building technique a try on your next wilderness adventure - you might be pleasantly surprised by how deliciously smoky your meat turns out!
Principles of Meat Smoking
To smoke meat in the wild successfully, you need to understand the basic principles of smoking meat. Smoking is a method of preserving food that involves exposing it to smoke from burning wood, which imparts a unique flavor and tenderizes the meat. One important aspect of successful meat smoking is time; you have to allow enough time for the heat and smoke to penetrate your meat fully. Another key element is temperature control because fluctuating temperatures can make your smoked food unsafe for consumption.
Choosing the right wood for smoking your meat also affects both its flavor and texture. Different woods burn at different temperatures, resulting in distinct flavors when used for smoking meats. For example, hickory has a strong pungent taste while applewood has a subtle fruity aroma.
Lastly, proper preparation of your smoked meats is crucial to ensuring they’re safe to consume later on. You must remove excess moisture or inject brine into larger cuts of meat to prevent bacteria growth during hot-smoking process; low-temperature techniques such as cold-smoking may require additional curing methods.
By understanding these principles thoroughly before embarking on outdoor cooking survival tips or making plans about primitive equipment set up required for making an outdoor smoker will improve your chances of success with DIY outdoor foods preservation methods in wilderness situations.
Gathering Materials

When it comes to building a DIY meat smoker in the wild, gathering the right materials is essential. Fortunately, many of the necessary items can be found in nature or easily sourced from local stores. First and foremost, you will need wood for smoking your meat. Hardwoods such as oak, hickory, maple, and fruit trees like applewood are excellent choices when smoking meat due to their dense cells that create robust smoke flavors. You’ll also need tools such as saws, axes, knives (including extra blades), pliers for bending wire mesh or hardware cloth used in constructing a smoker’s firebox or chimney damper. Metal grates can be salvaged from old grill grates or purchased at stores/online retailers specializing in outdoor cooking equipment.
In addition to these basics, consider adding insulation material such as rock wool batting or fiberglass to improve temperature control during cooking and preserve heat for long periods over lower-temperature burning woods like cherrywood; use soda cans with bottoms cut off as chimneys when using metal drums as the body of your DIY cinderblock smoker projects with concrete blocks making up its structure if you want something more permanent that allows you to cook larger quantities of food at one time.
Choosing the Right Wood

When it comes to smoking meat in the wild, choosing the right wood is essential for achieving that perfect smoky flavor. Different types of wood can produce different flavors, so it’s important to consider which type of wood will complement the meat you’re smoking.
Some popular options include hickory, mesquite, applewood, cherrywood, and oak. Hickory is a classic choice that pairs well with pork and beef. Mesquite has a strong flavor that works well with lean meats like chicken and fish. Applewood and cherrywood have a sweeter flavor that complements lighter meats like poultry and fish.
It’s also crucial to select dry wood for smoking as wet or green wood can produce too much smoke and ruin the taste of your meat.
In addition to selecting the right type of wood, pay attention to its size as smaller pieces burn faster while larger logs take longer to ignite but burn more slowly. As you build your DIY smoker in the wild or prepare your open campfire pit for outdoor cooking techniques make sure you gather enough dry firewood cut at appropriate sizes depending on what dishes require higher temperatures or longer smokes.
Overall, taking time in choosing the perfect wood can elevate any dish when used appropriately during outdoor smoking techniques creating an enhanced unique taste itself generating a captive audience amongst friends or community members attending these occasions by adding natural smoke flavor symmetrically executed due selecting appropriate woods aiding culinary experiences all around firelight seasoned meals bringing out earthy goodness unlike no other ways could ever achieve!
Building the Meat Smoker
https://www.youtube.com/watch?v=zAMU3X8Np0k
Have you ever considered building your own meat smoker? As someone who loves the great outdoors and can appreciate survivalist skills, I highly recommend giving it a go. Creating your own DIY outdoor meat smoker is not only enjoyable, but also rewarding.
To begin, gather essential materials such as bricks, tools, wood scraps or drums that serve as the stove. Choosing the right type of wood depends on your recipe’s smoke flavor needs. It’s important to consider how much meat you want to smoke at one time when determining the size of your smoker; most homemade smokers are small and can hold enough meat for up to 10 people. Building a smoker from scratch is often less expensive than purchasing one pre-made.
There are various methods of constructing a smoker depending on availability and accessibility of materials. Options include drum-style smokers, cinder block pit style smokers, offset barrel smokers among others.
Proper airflow (Draft) is crucial in building an effective meat smoker; too little air flow may cause food poisoning while too much draft may result in dry food. Therefore it’s vital to monitor temperature using thermometers to keep track of both internal temperatures —for sustaining quality smoked meats-, external heat levels —for preventing fire hazards including external ignition sources -
With DIY techniques comes creativity! So feel free experiment and incorporate ropes or wicker baskets into your design for a rustic effect with natural textures that enhance the ultimate wild-smoking experience!
Don’t hesitate to take on this challenge - follow this guide for some additional help!
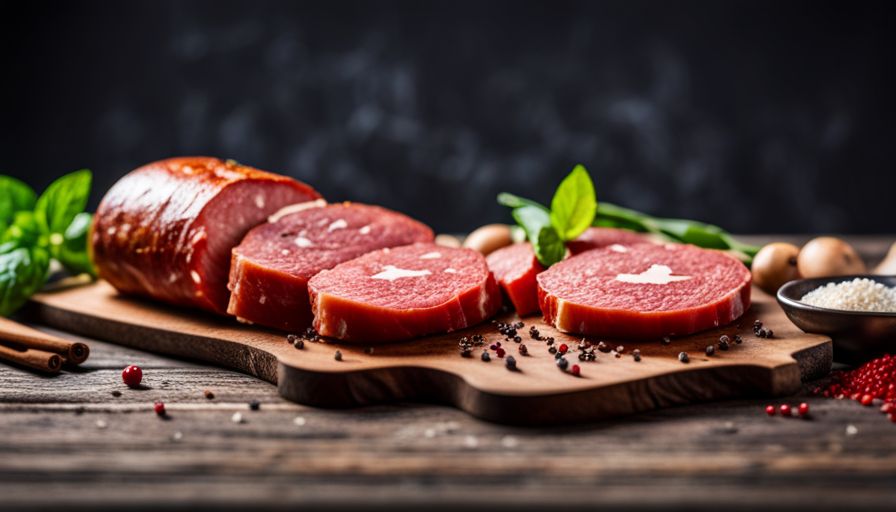
Preparing the Meat

Before smoking the meat in the wild, it’s essential to prepare it properly. Inadequate preparation can lead to potential health hazards and spoilage of the food. In this section, we will discuss some tips for preparing meat for smoking in a survival situation.
Firstly, always ensure that your meat is fresh and not spoiled as spoilt meat cannot be preserved by smoking or any other method. It’s best to source your meat from hunting or fishing in the wild but if you are using store-bought meats then observe their expiry date before purchase.
Next, trimming excess fat helps prevent greasiness while also reducing flare-ups and smoke irregularities during cooking. Additionally, slicing the meat thin ensures even heat distribution thereby preventing undercooked sections of meat when slow-cooking over flames.
Thirdly, marinating is critical as flavors are infused into the flesh during this process thus enhancing overall taste. Marination also provides added moisture ensuring a juicy finished product after cooking.
Finally using natural flavorings such as garlic powder or sage coupled with salt helps give distinct tastes that balance well with smoky flavors from outdoor fire roasting.
With these simple techniques applied carefully you can greatly enhance your wilderness survival cooking!
Removing Meat Moisture
When it comes to smoking meat, removing excess moisture is key for a tasty result. No one wants an overly moist hunk of meat that can’t soak up the smoky goodness! Luckily, there are a few different ways you can dry out your meat pre-smoke. The method you choose will depend on what materials and time you have at your disposal.
One possibility is using salt as a dry brine to remove moisture, creating a flavorful salty crust. Alternatively, you could use paper towels or cloth to pat-dry the surface of your meat before smoking. For more advanced smokers, air-drying is an option - simply hang your meat in a location with good airflow and low humidity until a sticky pellicle forms on its surface.
No matter which approach you take, don’t forget this important step! Properly dried out meats lead to juicy and flavorful results that can be stored for longer periods without spoilage that could ruin all your hard work.
Smoking Meat: Tips and Techniques
https://www.youtube.com/watch?v=nKAf\_NbtsSc
When it comes to smoking meat in the wild, there are many tips and techniques that can make this process a success. One important factor is choosing the right smoking technique. Whether you opt for hot smoking or cold smoking, each method produces unique flavors and textures in your smoked meats. To achieve a perfect result every time, consider exploring various outdoor cooking methods, such as using campfire cooking techniques or building an outdoor smoker.
Another crucial consideration is preserving your smoked meat for prolonged consumption. Survival food preservation methods like freezing, curing, corning, pickling, and burial can be applied when preserving both fresh and smoked meats.
Choosing the appropriate wood for creating fire on which to smoke your meat will also have a significant impact on end taste of the dish. Attempting to smoke over excessive heat may lead to toughening of the meat so you need proper guidance here too.
To get started with DIY deployment of these indispensable outdoor cooking tricks means understanding natural meat smoking techniques while increasing environmental knowledge involving wilderness survival food preparation methods; designing an equipment-free kitchen without giving up delicious meals.
Storage and Preservation of Smoked Meat
Now that I’ve mastered the skill of smoking meat in the great outdoors, I need to make sure it stays fresh for future snacking. Smoking meat definitely elongates its expiration date but precautions are still necessary.
For safekeeping, frozen storing is a viable option. To keep smoke infused flavors intact during freezing, wrap the smoked meat with plastic wrap or foil before placing into an airtight container or freezer bag. Another method is vacuum sealing which nixes air from entering into the packaging thereby reducing any unsavory freezer burn.
To maintain optimal taste and quality of your smoked meat, find a cool and dry area without direct sunlight as heat and light can hasten spoilage. Always use clean hands or utensils when handling smoked food to prevent contamination by bacteria from either source.
Other preservation means such as confit (cooking slowly in fat), corning (preservation via salt curing), pickling (soaking in acidic solution) offer different storage options that may suit varying outdoor scenarios.
Preserving my laboriously hunted wild game this way ensures they stay edible and delicious till chow time at base camp!
Conclusion
As an avid outdoor enthusiast, I can confidently say that learning how to smoke meat in the wild is both a thrilling and fulfilling experience. Not only does it produce meat full of delectable flavors, but it also allows for primal culinary techniques that foster connection with nature.
To guarantee your smoked meat stays fresh for weeks, it’s essential to master various preservation methods like curing and corning. It involves using hot and cold smoking techniques that are easily understandable by following the methods mentioned in this article.
If you’re up for a challenge, designing your DIY meat smoker with naturally occurring elements from the wilderness could be something worth considering. To ensure your success on this project, gather all necessary materials and source the best wood suited for smoking.
Ultimately, gaining proficiency in these skills enhances not only camping or hiking trips but also proves useful during emergencies when traditional ways of preserving food might not be possible.